Bill's Aircraft Factory
Building in the Basement and Moving to the Airport
E-mail:
bill (at) repucci (dot) com
|
Aileron construction
Caution - Man running (with) power tools
| |||||||||||
 F
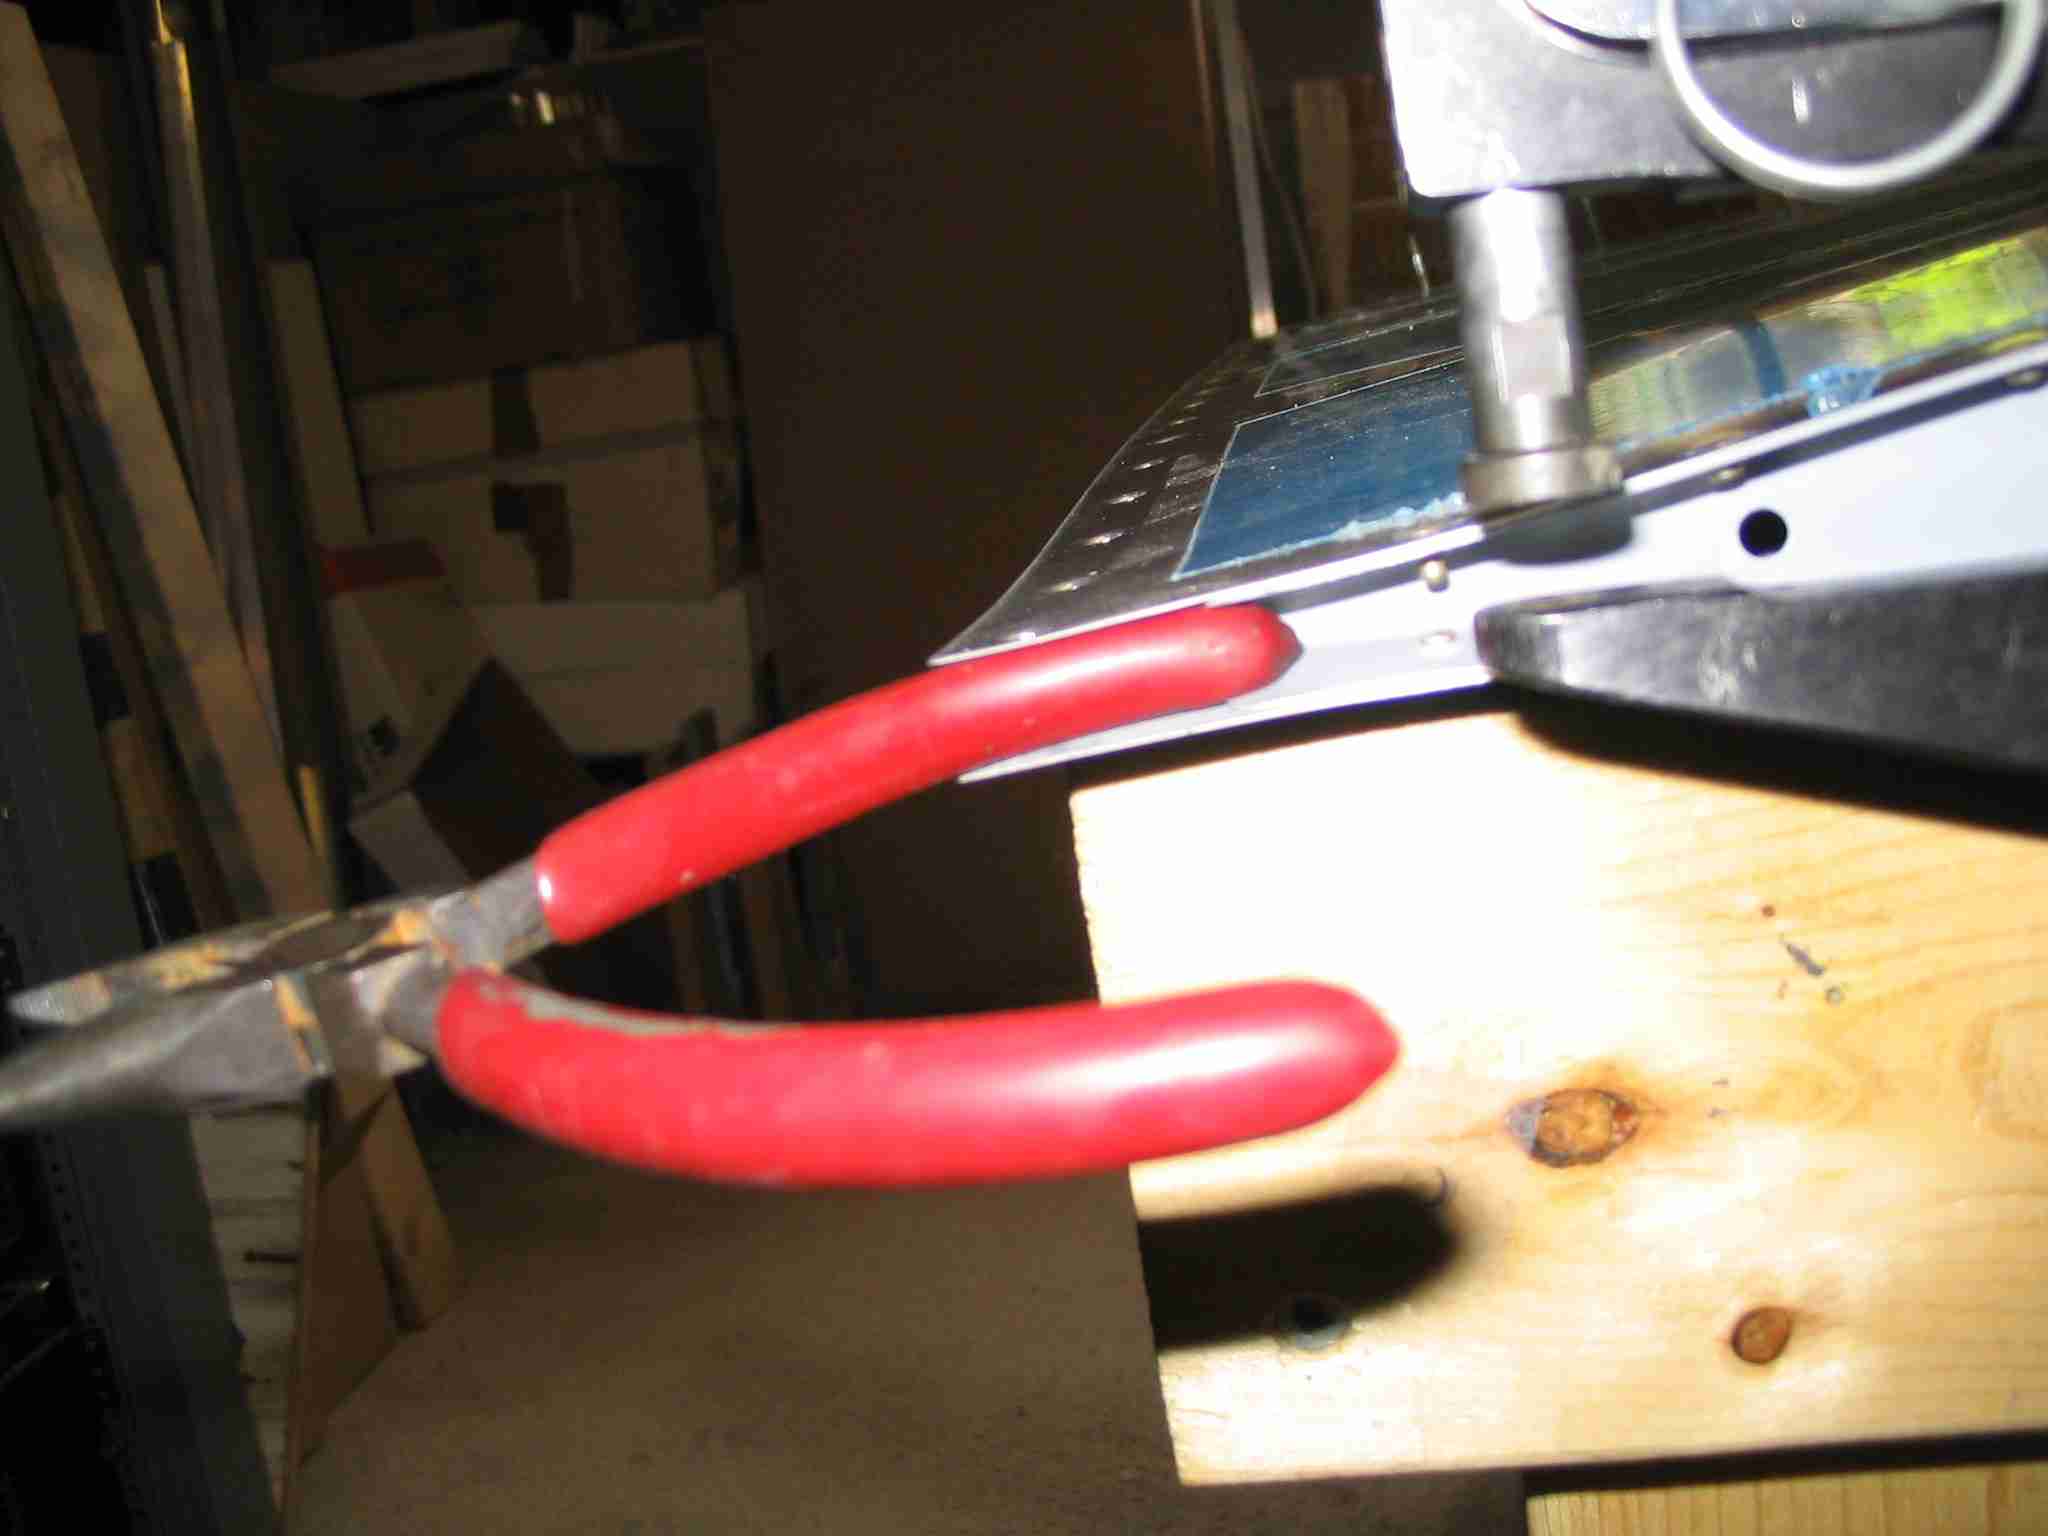
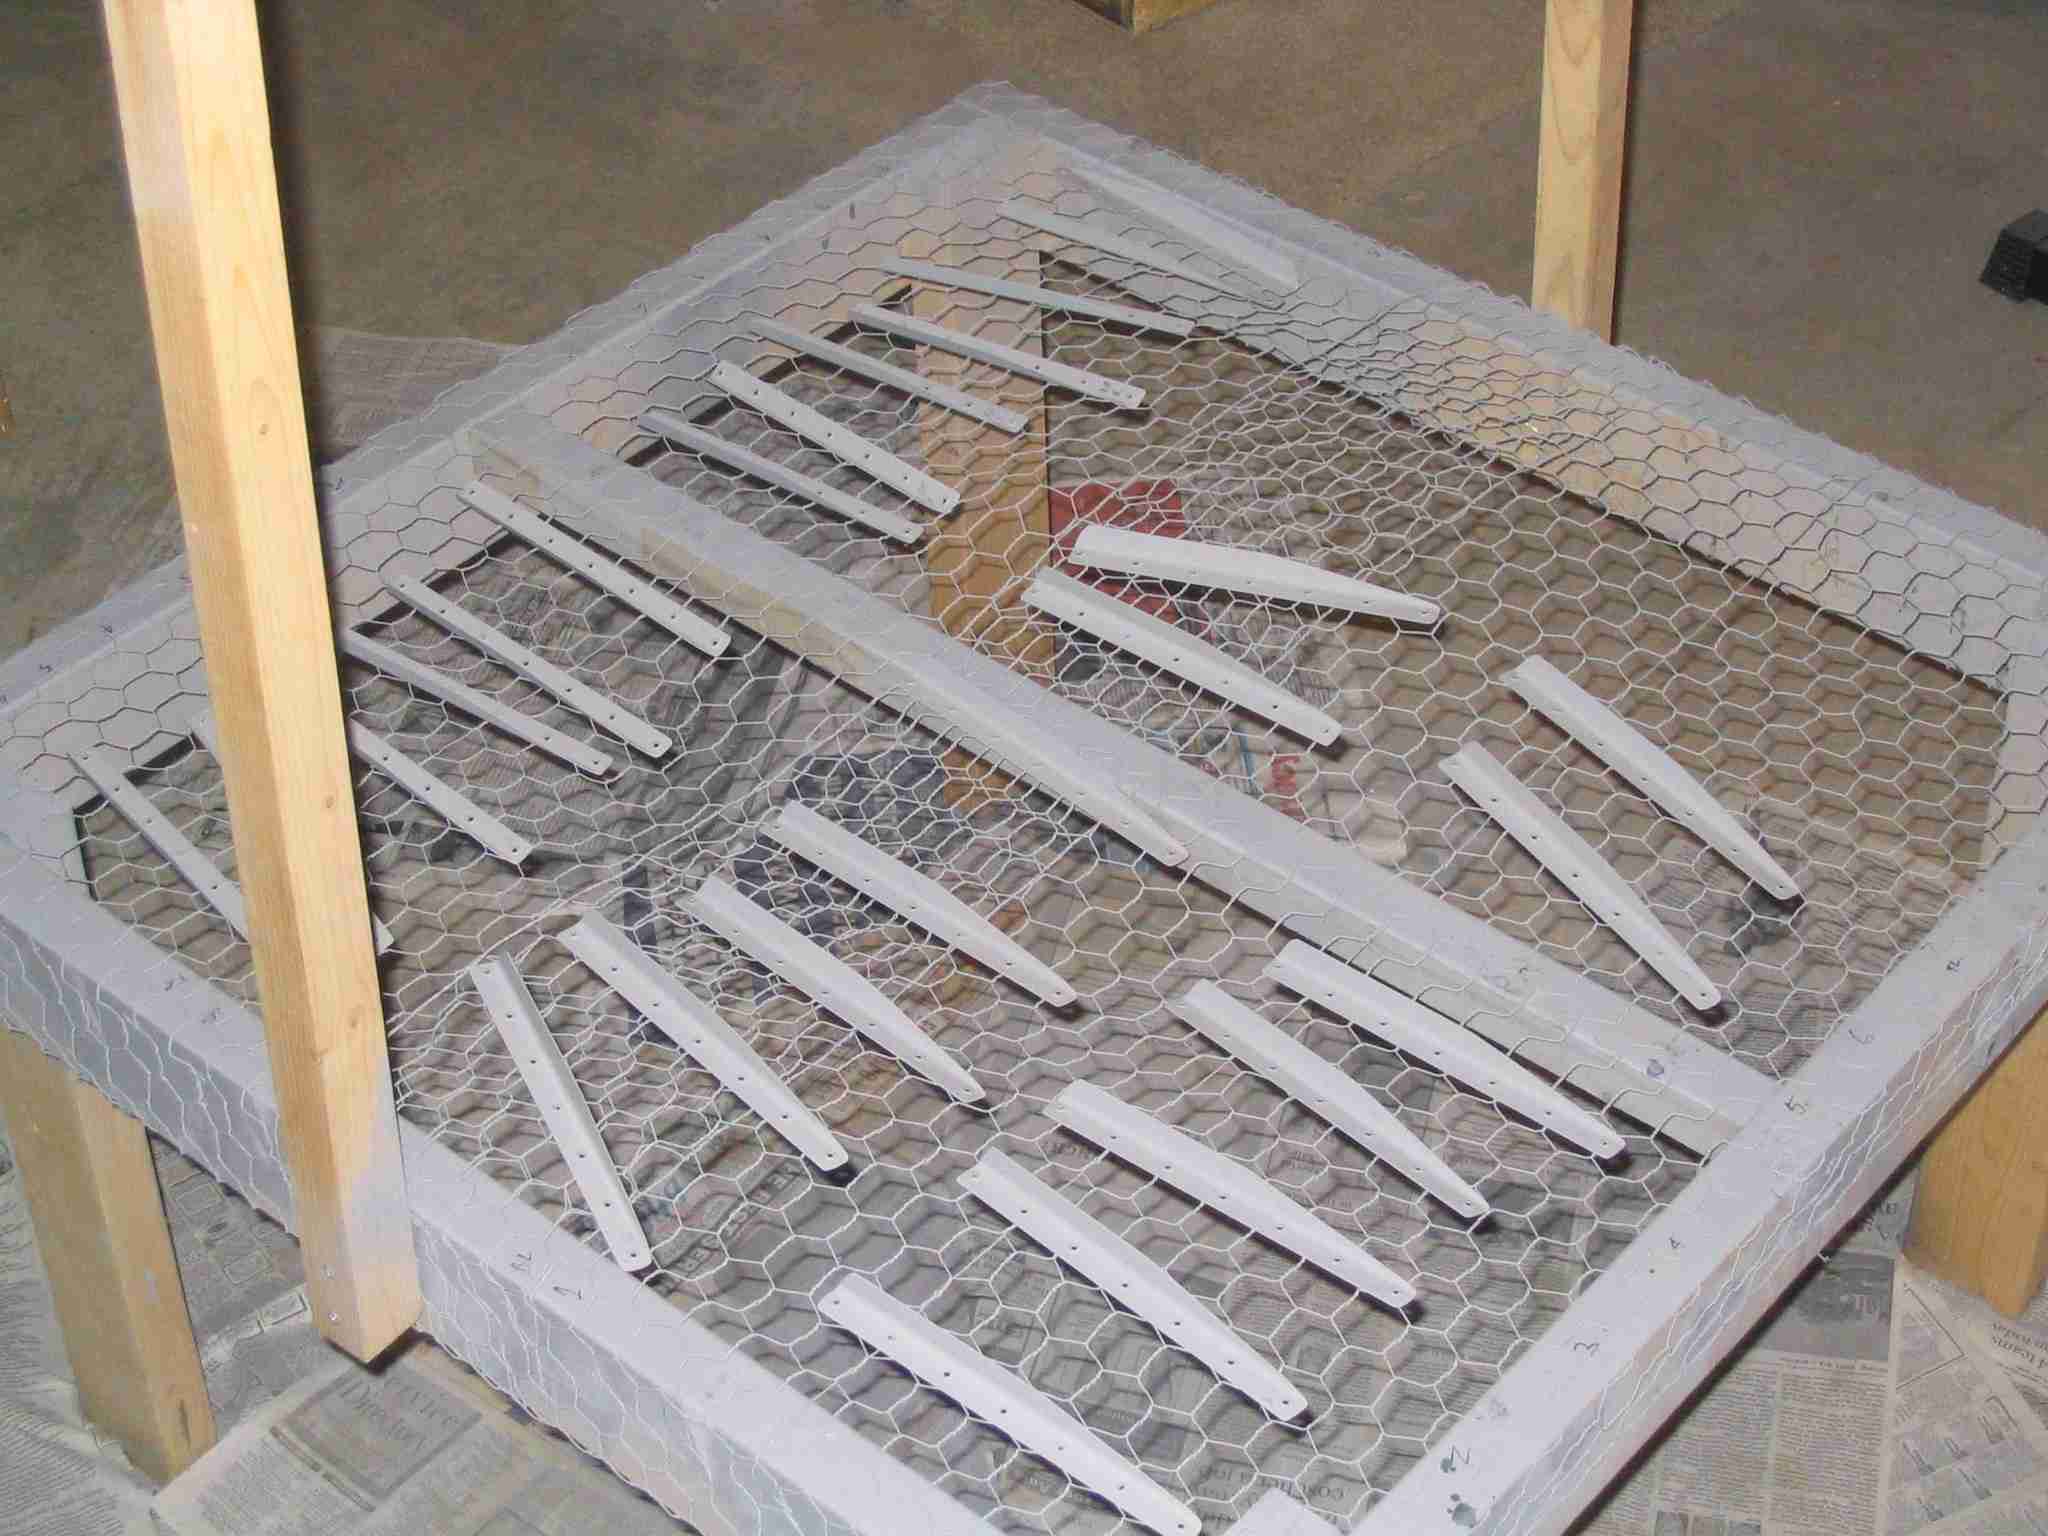
After trashing four #30 bits drilling the leading aileron edge
to the stainless steel counterbalance you get this porcupine
looking thing. (5/13/04) F
After trashing four #30 bits drilling the leading aileron edge
to the stainless steel counterbalance you get this porcupine
looking thing. (5/13/04)There is a better way. Assemble the aileron as per the instructions, then use your #30 bit to mark the location of the holes in the stainless steel counterbalance. When ready, disassemble the entire thing and drill out the holes in the counterbalance. This will keep you from wallowing out the holes in the leading edge skin. |
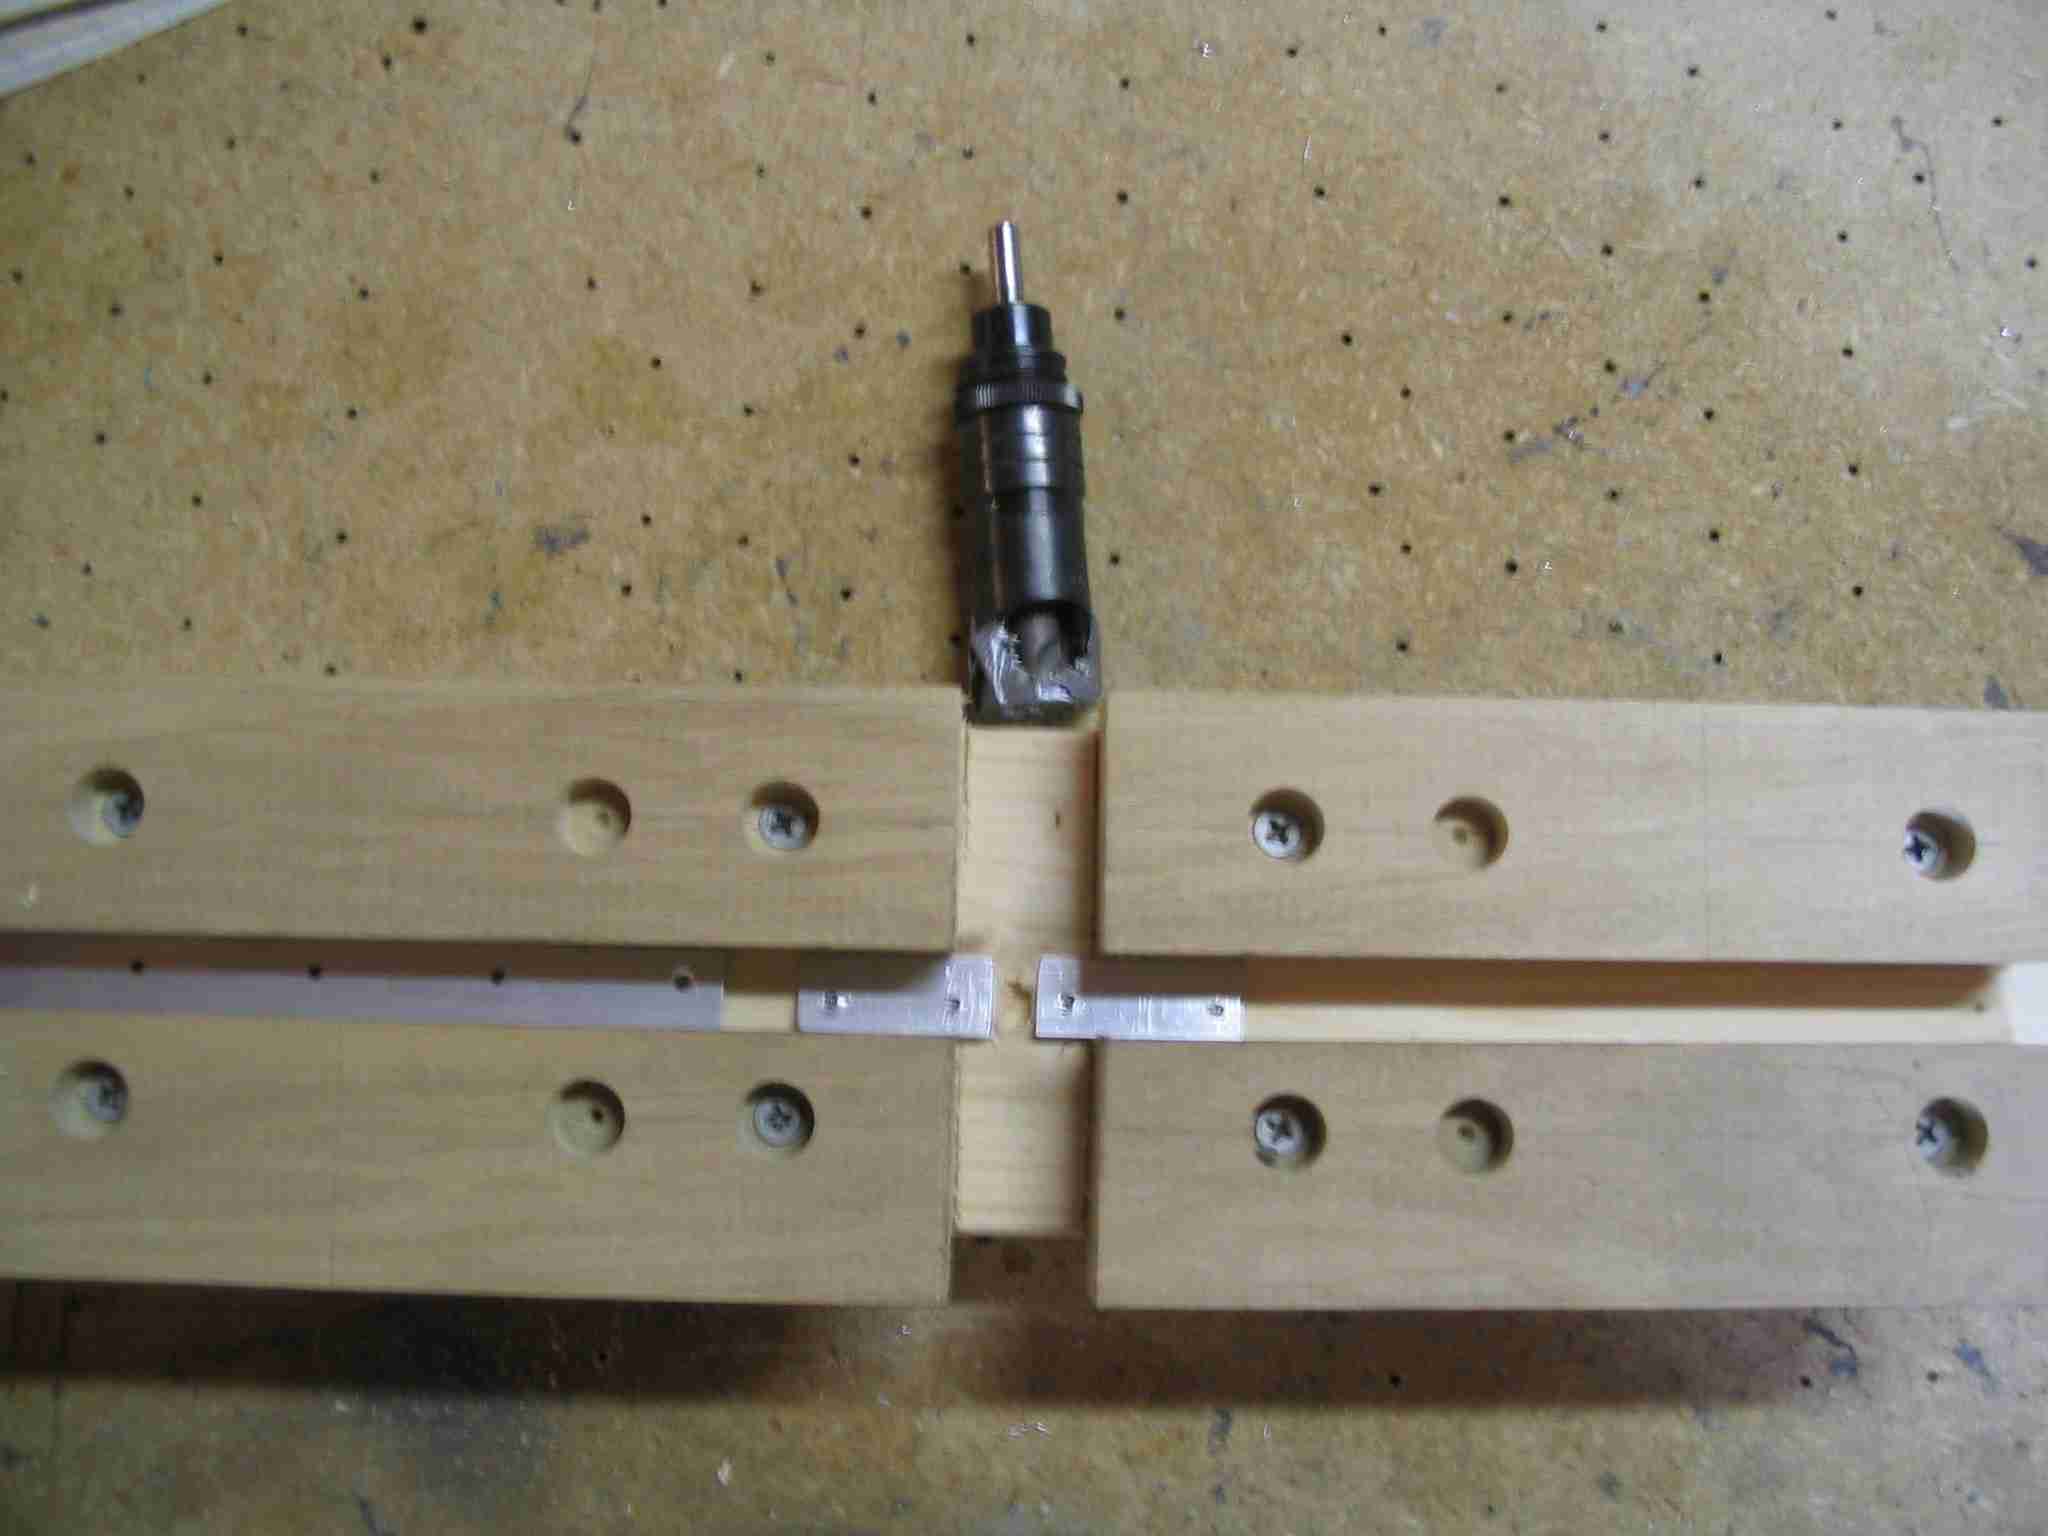 E
The trailing edges of the rudder, ailerons, and flaps have to be match
drilled at a funny angle while holding an aluminum wedge in place that
runs the length of each part. Once the holes are drilled the part needs
to be countersunk. I made this little jig to hold the wedge while I
countersink it. The two little pieces were off the end of the wedge.
They were then drilled and nailed into place with the nails being set
below their surface. This jig holds the surface of the wedge flat, which
makes counter sinking much easier. (5/21/04) E
The trailing edges of the rudder, ailerons, and flaps have to be match
drilled at a funny angle while holding an aluminum wedge in place that
runs the length of each part. Once the holes are drilled the part needs
to be countersunk. I made this little jig to hold the wedge while I
countersink it. The two little pieces were off the end of the wedge.
They were then drilled and nailed into place with the nails being set
below their surface. This jig holds the surface of the wedge flat, which
makes counter sinking much easier. (5/21/04) |
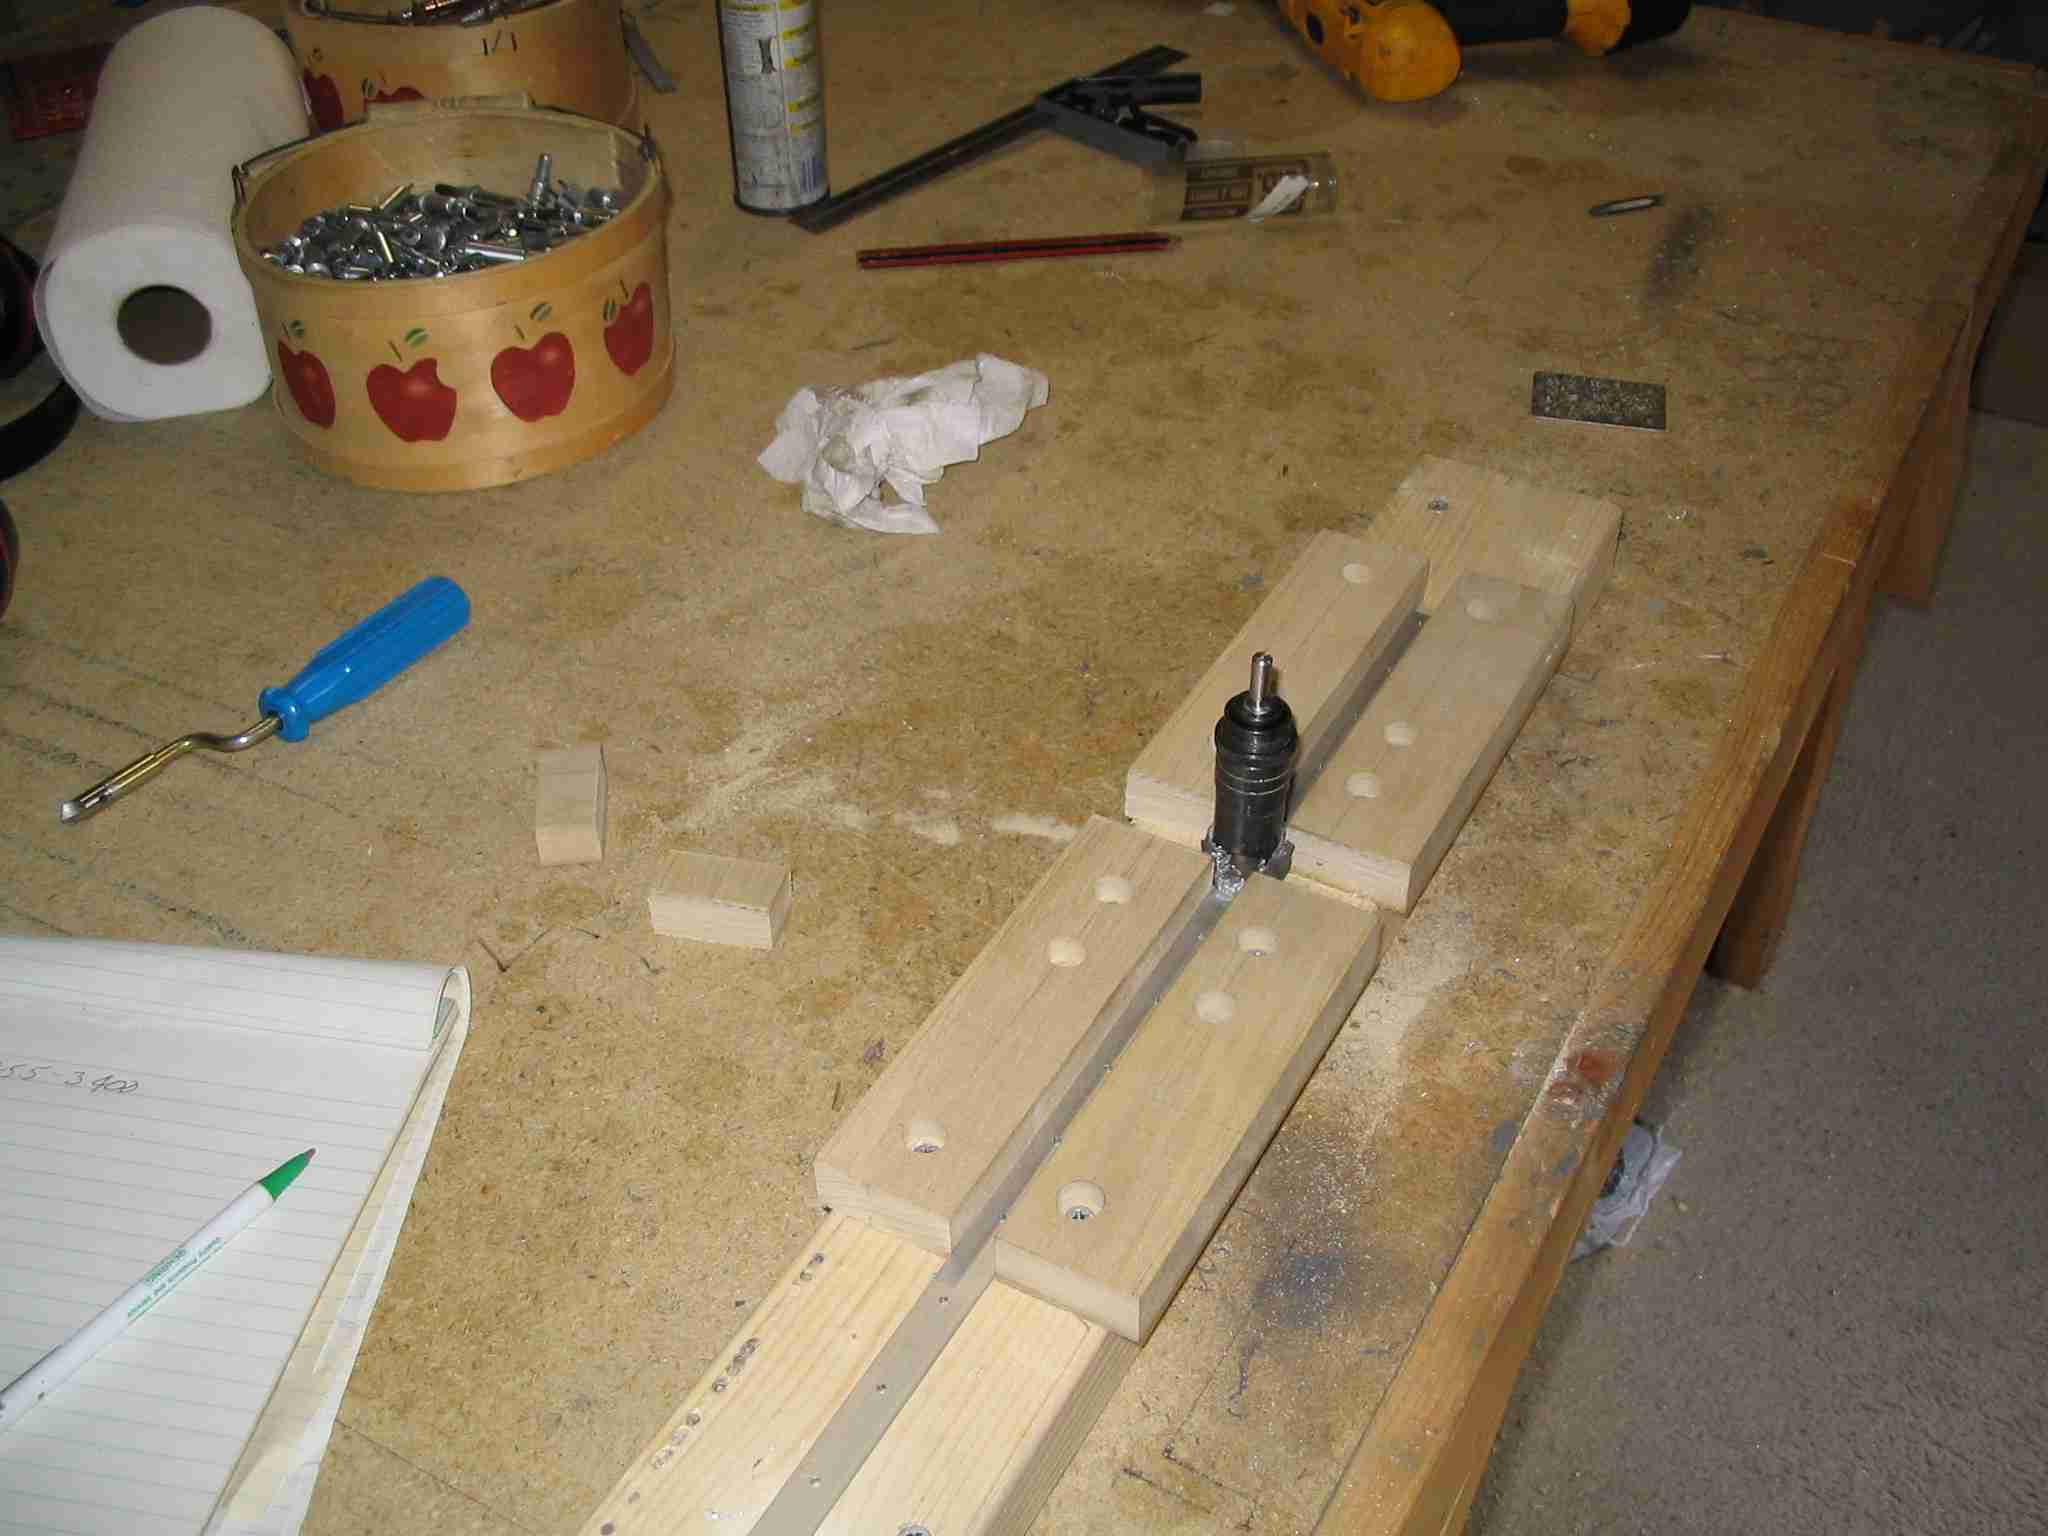 F
Here is a picture of the jig with a wedge in place and the
countersinking tool inserted in one of the holes.
(5/21/04) F
Here is a picture of the jig with a wedge in place and the
countersinking tool inserted in one of the holes.
(5/21/04) |
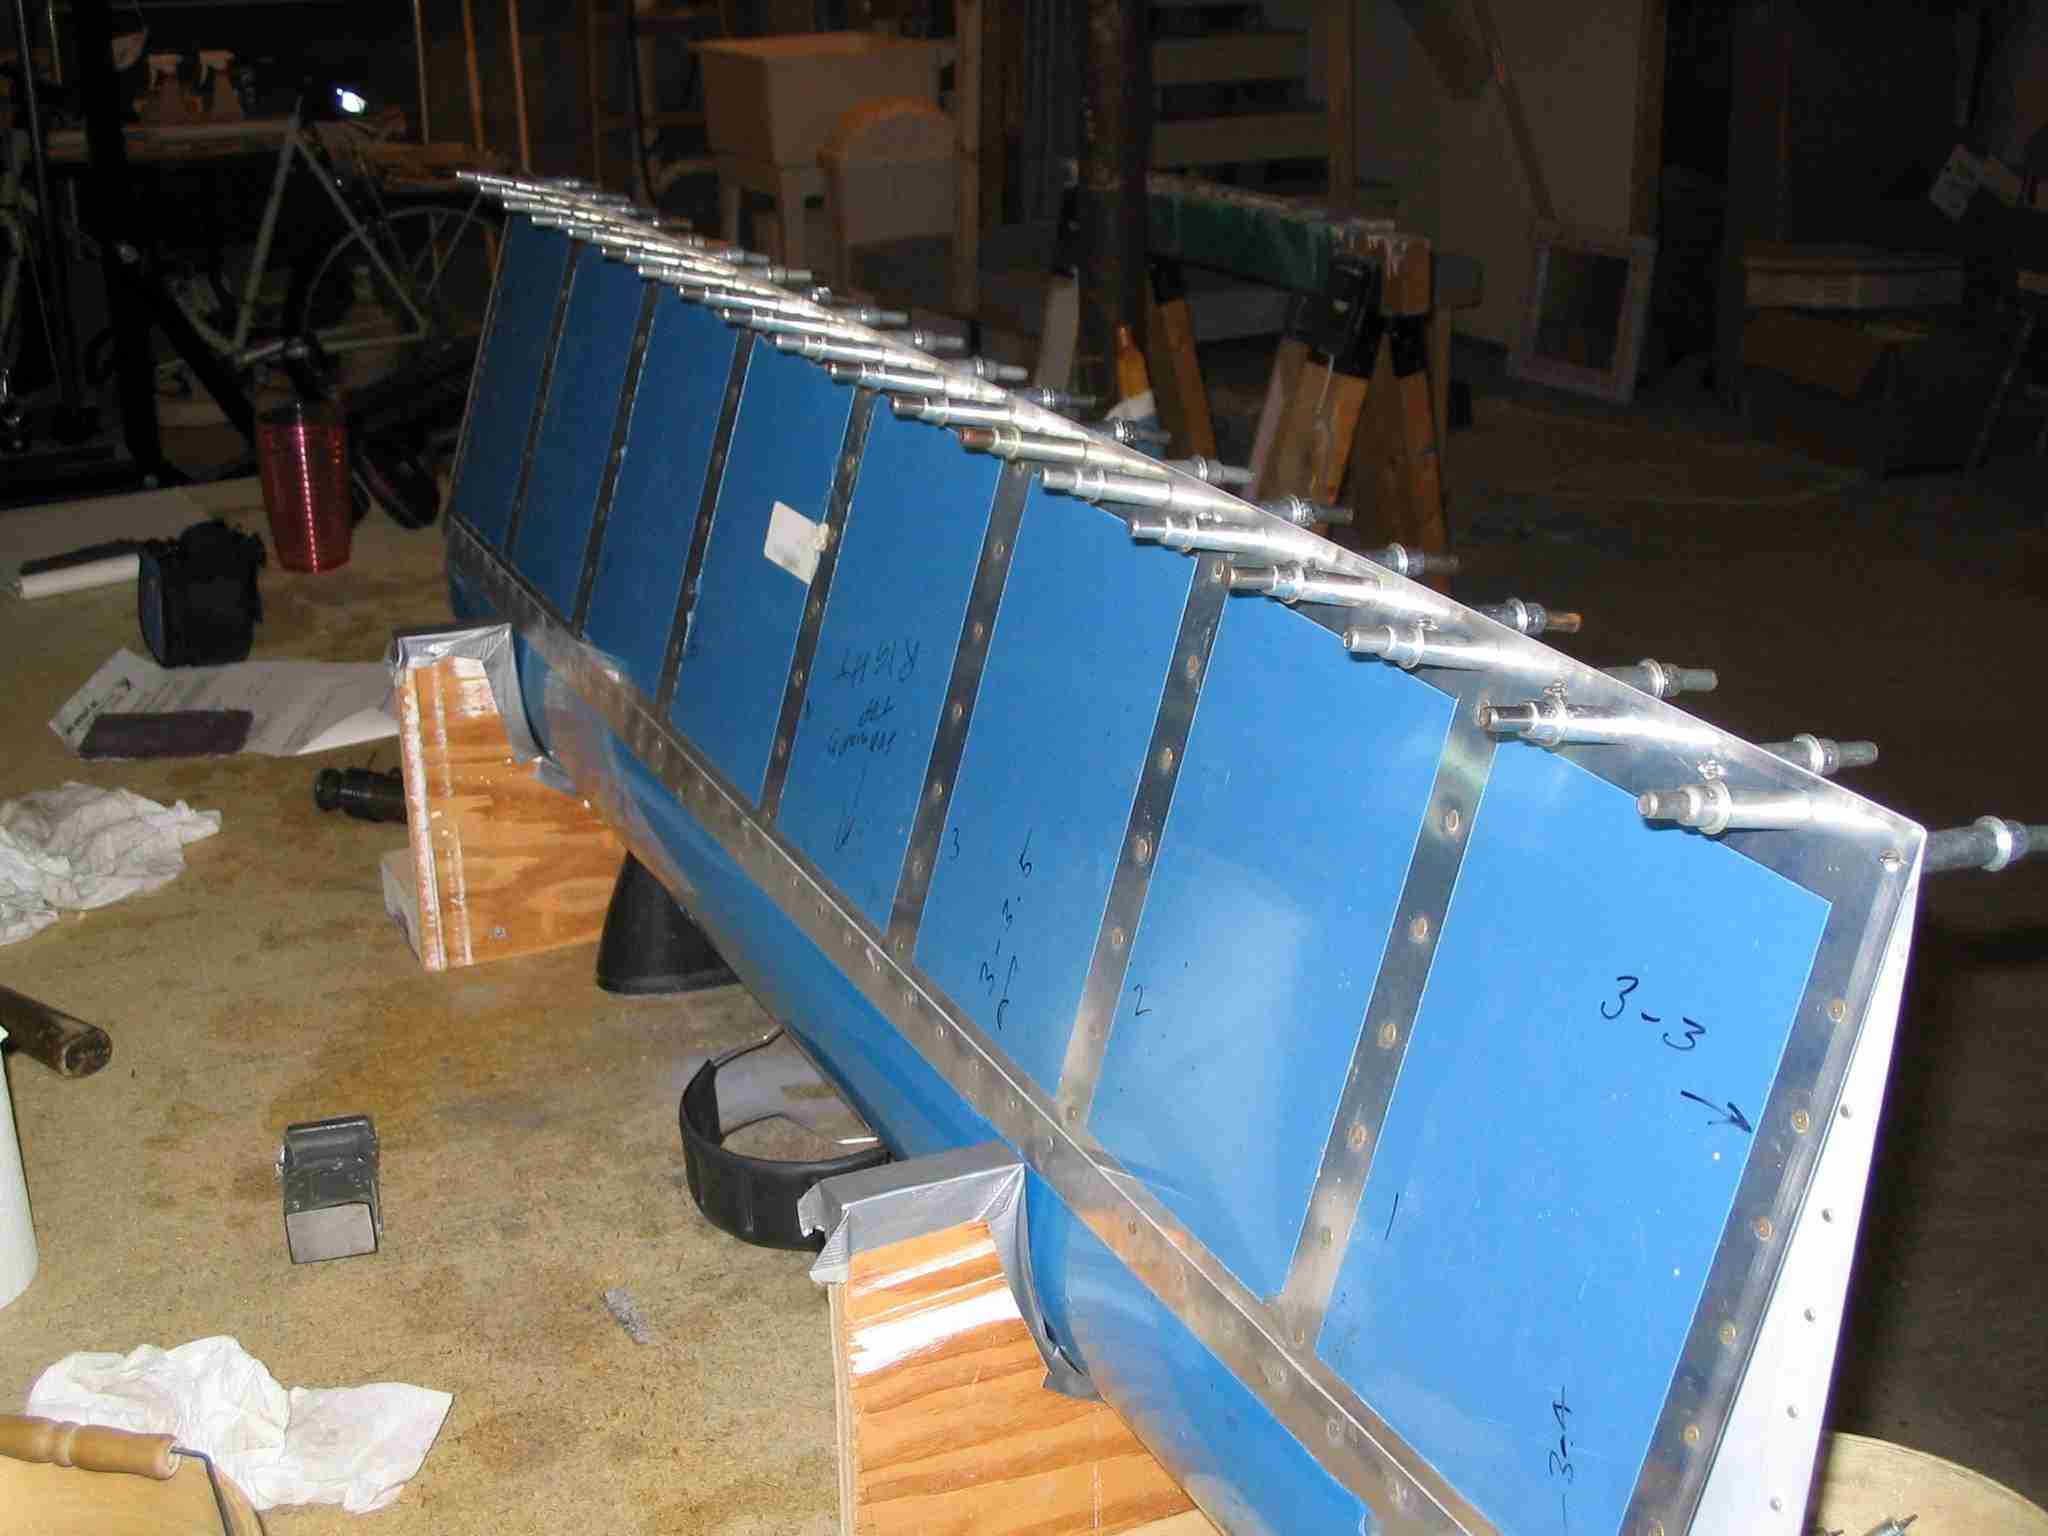 E
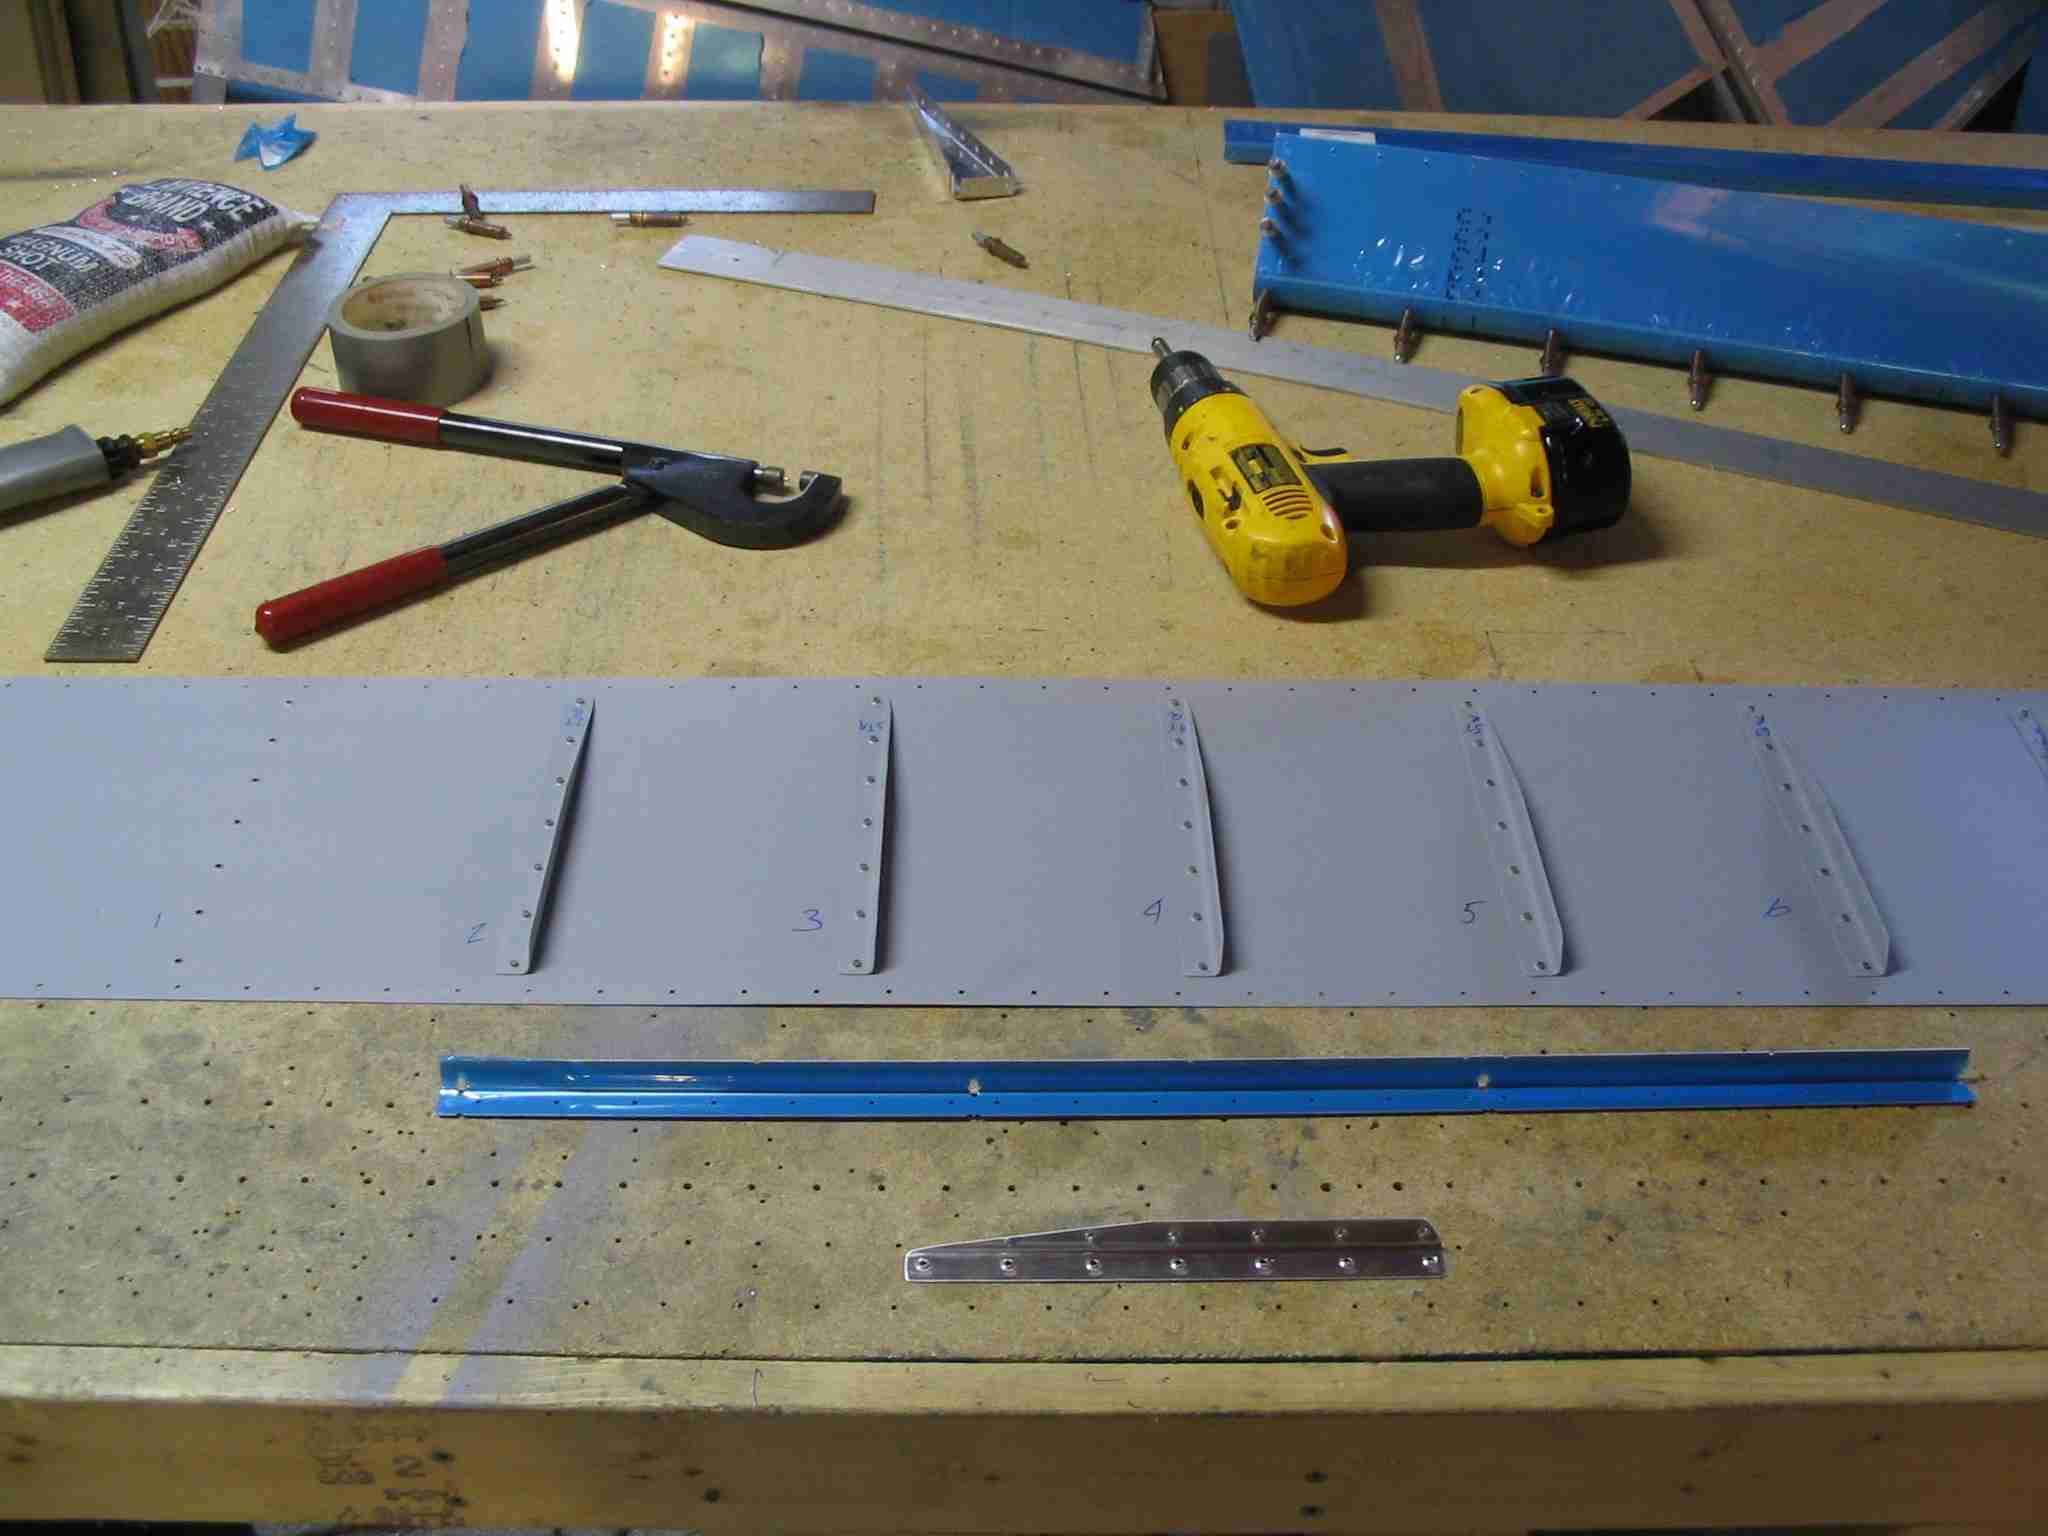
The trick to getting a straight riveted trailing edge is to
start with a straight clecoed trailing edge. I found
that by putting all the clecos in from one side caused my TE
to bend. By alternating the clecos top and bottom the TE
miraculously straightened itself out. Note the call outs
for the rivet sizes on the top of the aileron. This
keeps me from doing something dumb, like putting the wrong
rivet in the wrong hole. (05/23/04) E
The trick to getting a straight riveted trailing edge is to
start with a straight clecoed trailing edge. I found
that by putting all the clecos in from one side caused my TE
to bend. By alternating the clecos top and bottom the TE
miraculously straightened itself out. Note the call outs
for the rivet sizes on the top of the aileron. This
keeps me from doing something dumb, like putting the wrong
rivet in the wrong hole. (05/23/04) |
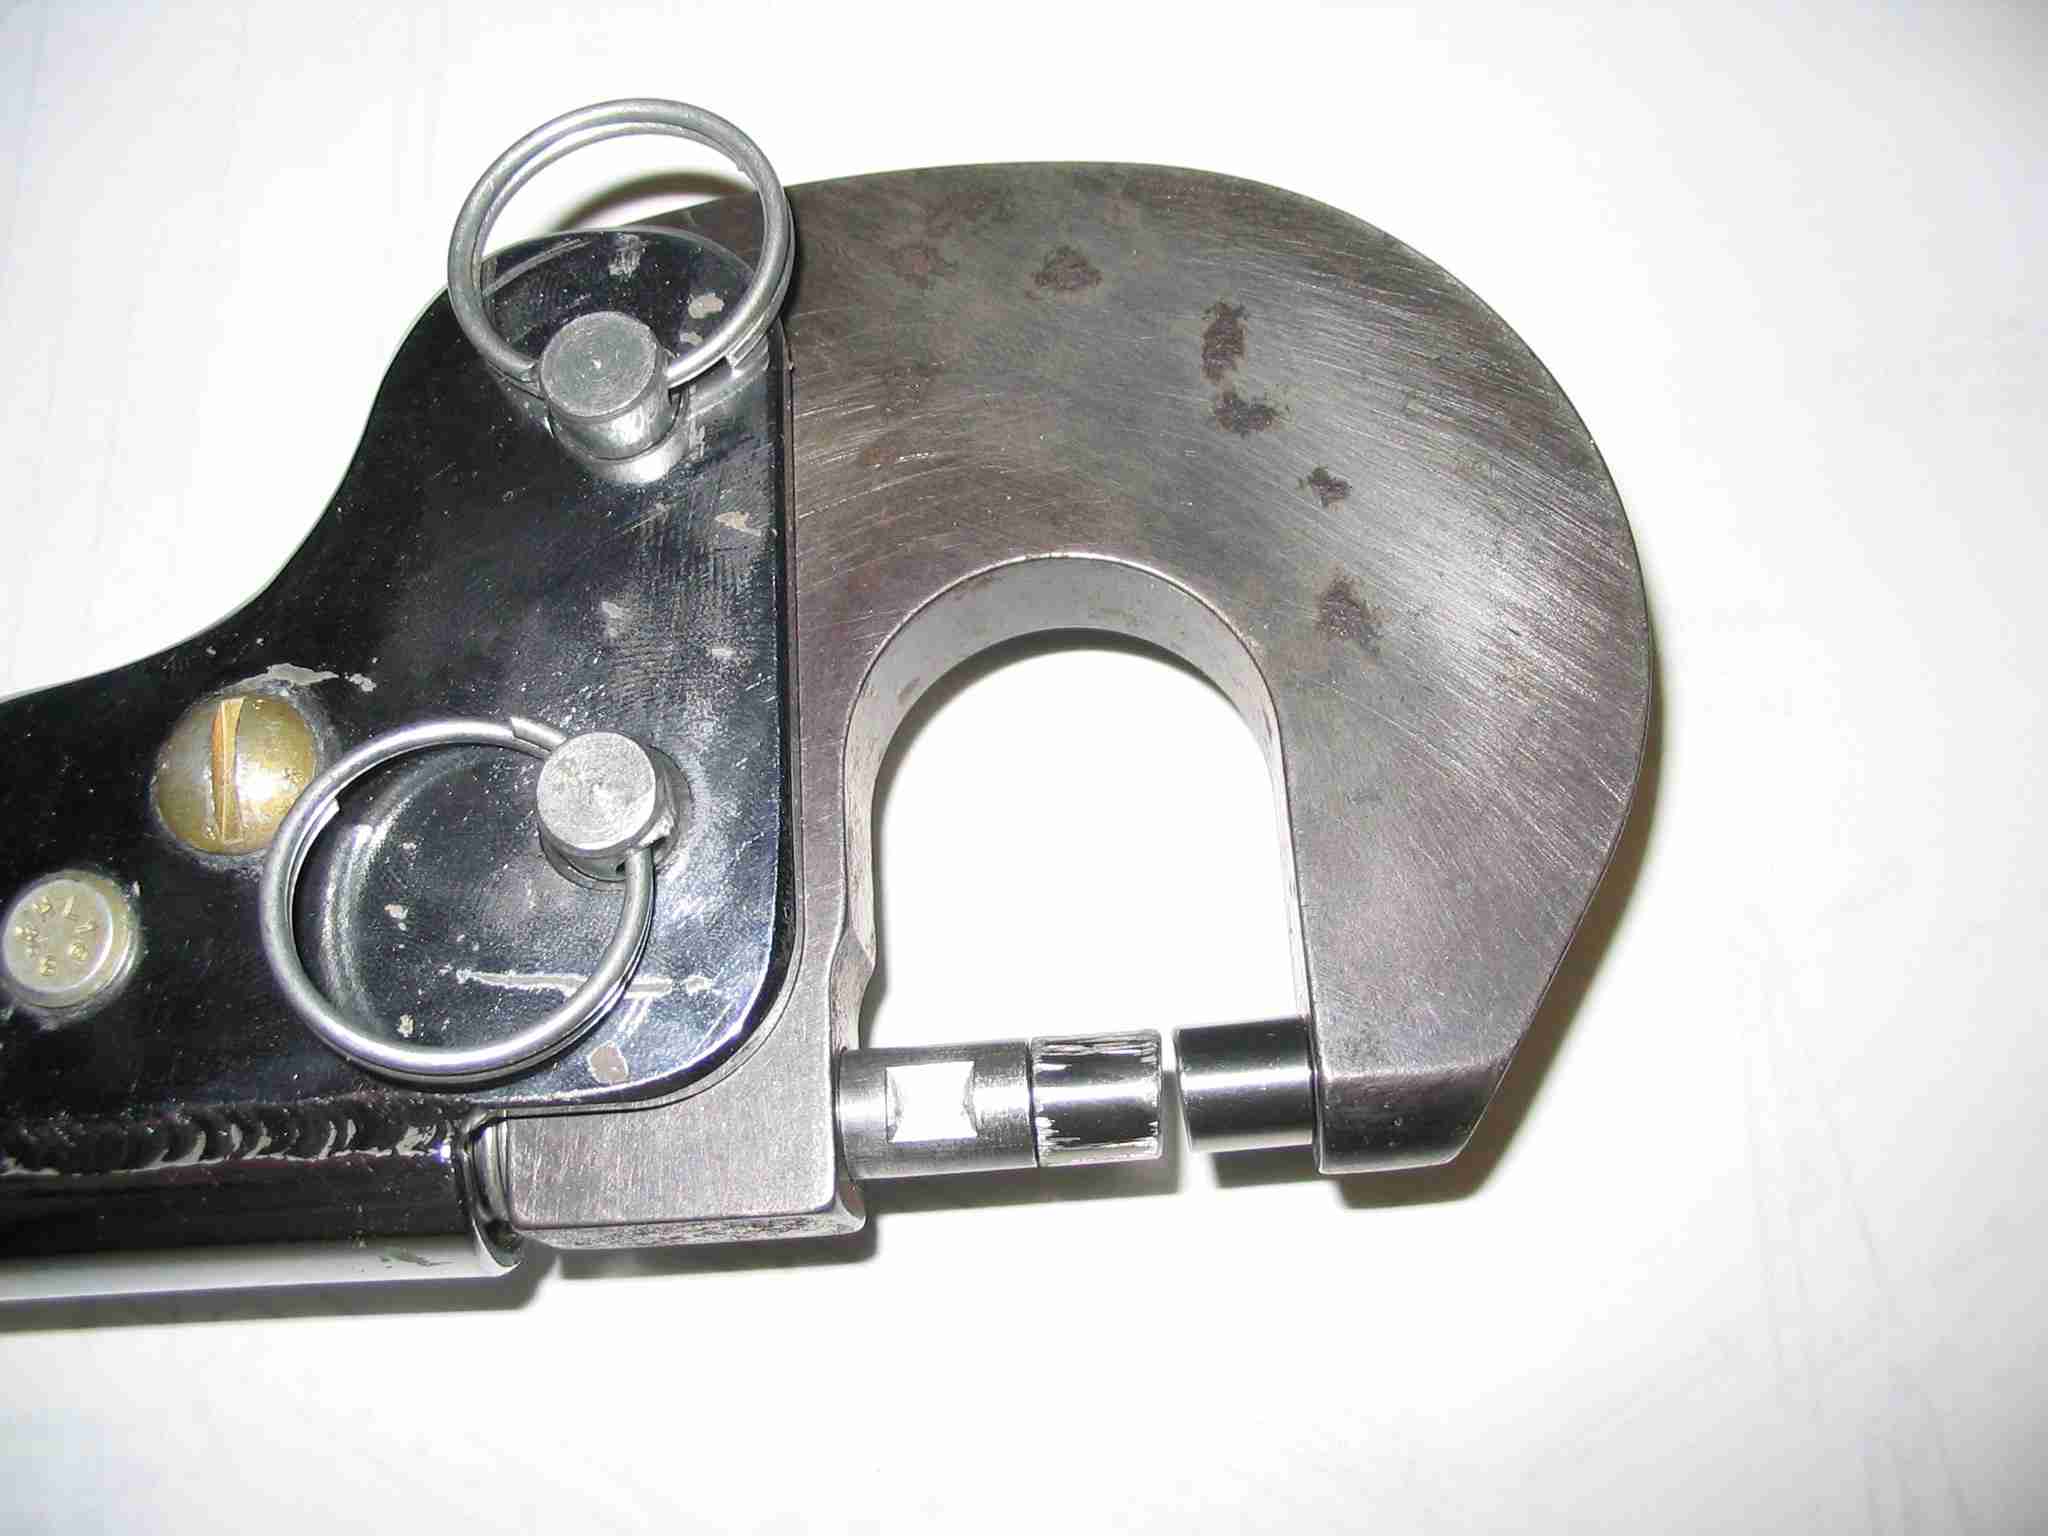 F
Take a look at the rivet set I ground down before reading the
next caption, it will help you understand how I drove my
rivets. F
Take a look at the rivet set I ground down before reading the
next caption, it will help you understand how I drove my
rivets. |
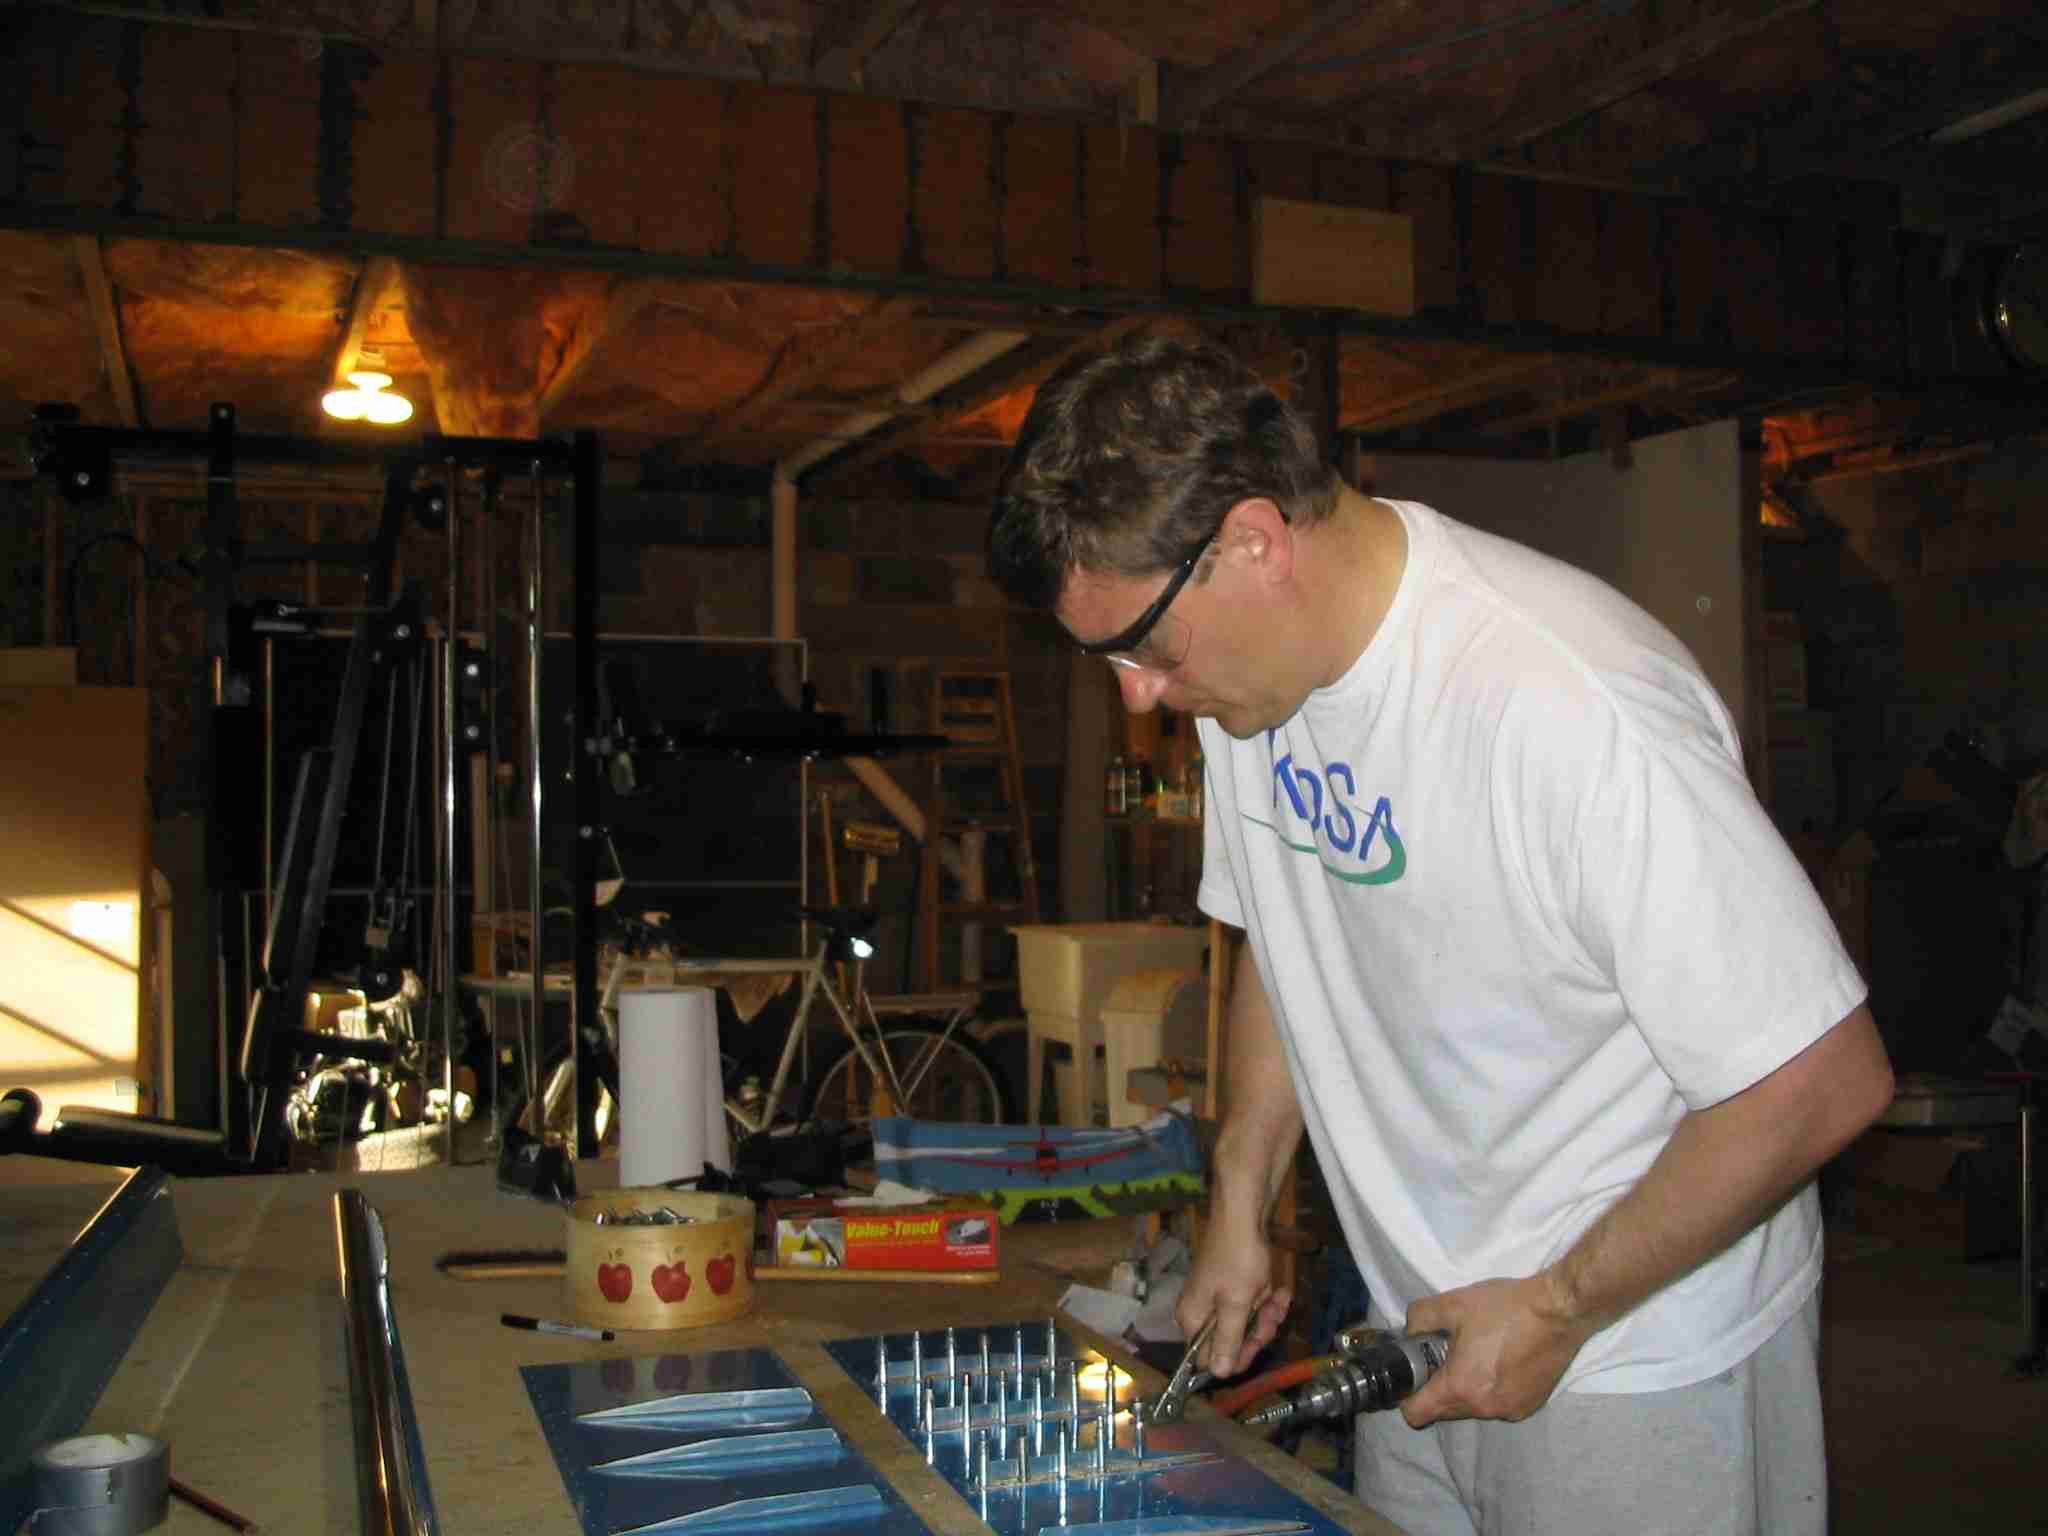
 E
After carefully squeezing the rivets in the trailing edge with a set of
custom ground rivet sets, the edge came out straight without the use of
proseal or other glue. I just simply followed the directions with
regard to the order of squeezing them. Start by 1/2 squeezing one
rivet in the middle, then one on each end. Then 1/2 squeeze a rivet
between the middle one and one of the ends, then 1/2 squeeze one on the
other side. Keep splitting the difference between the rivets while
moving back and fourth along the trailing edge. Once there is a 1/2
squeezed rivet in every hole, go back and squeeze them the rest of the way
in the same order in which they were 1/2 squeezed. (5/23/04) E
After carefully squeezing the rivets in the trailing edge with a set of
custom ground rivet sets, the edge came out straight without the use of
proseal or other glue. I just simply followed the directions with
regard to the order of squeezing them. Start by 1/2 squeezing one
rivet in the middle, then one on each end. Then 1/2 squeeze a rivet
between the middle one and one of the ends, then 1/2 squeeze one on the
other side. Keep splitting the difference between the rivets while
moving back and fourth along the trailing edge. Once there is a 1/2
squeezed rivet in every hole, go back and squeeze them the rest of the way
in the same order in which they were 1/2 squeezed. (5/23/04) |
|
|